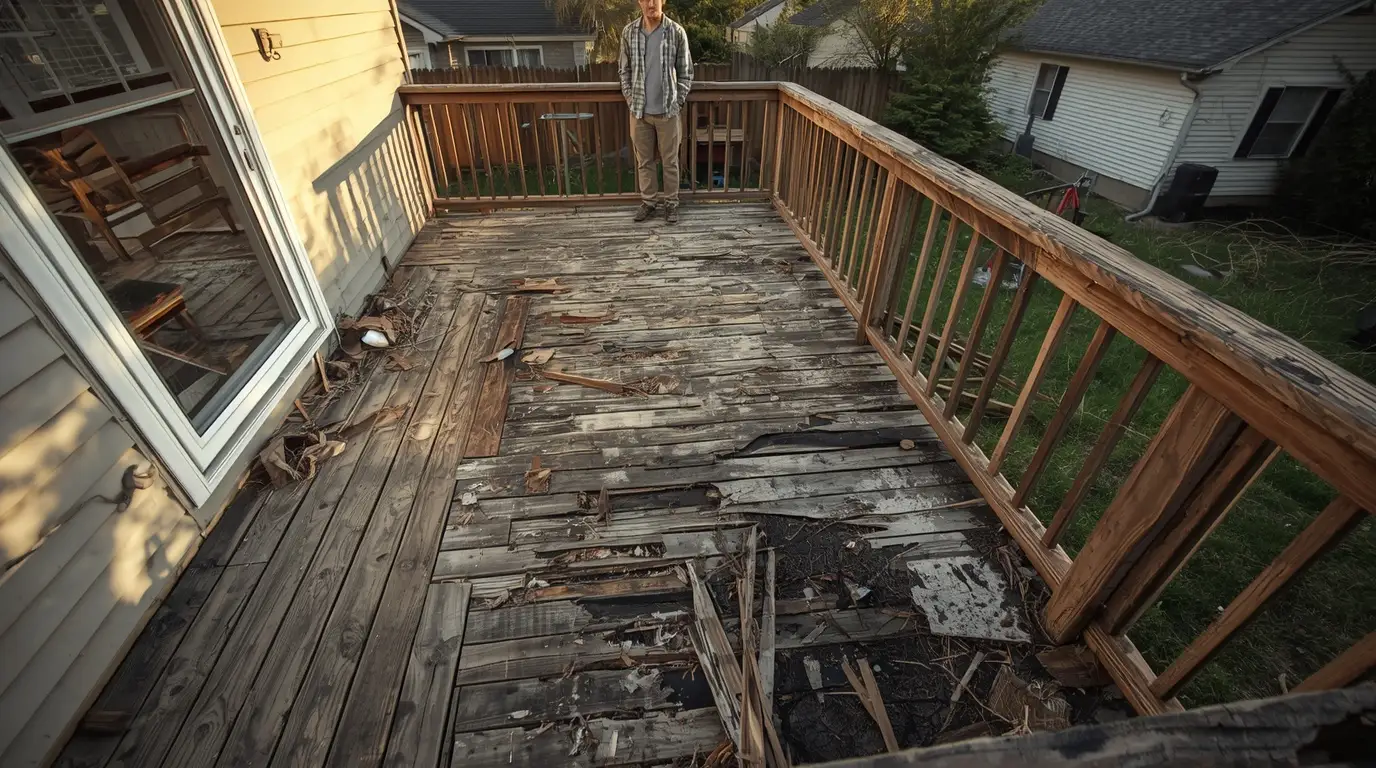
That old deck in your backyard is not getting any better on its own. Every season that passes, the boards rot a little more, the posts lean a little further, and the safety risk grows a little bigger. If you have been putting off deck demolition because it feels overwhelming, this guide is here to change that. You will learn exactly how the process works, what tools are involved, and when calling a professional team makes more sense than doing it yourself. By the end of this article, you will know exactly what to do next.
Deck demolition is the process of safely dismantling and removing an old or damaged deck from your property. Work from the top down railings first, then boards, then frame, then posts. Use the right tools, have a debris removal plan ready, and call a professional team when the job is bigger than one person can safely handle alone.
Why So Many Homeowners Are Tearing Down a Deck Right Now
Walk through any neighborhood and you will spot them old decks that have clearly passed their prime. Sagging boards, rusty nails poking up through the surface, railings that wobble when you touch them. These are not just cosmetic problems. They are real safety hazards that get worse every single season.
Most wood decks last 15 to 20 years with regular maintenance. After that, the combination of weather, moisture, UV exposure, and heavy use starts breaking things down at an accelerating rate. What starts as a few soft boards quickly becomes a structural problem that affects the entire deck.
Here is why homeowners are choosing to remove their decks rather than repair them:
- Safety comes first. A structurally compromised deck is a liability waiting to happen. One wrong step on a rotted board can cause a serious fall especially dangerous for children and elderly family members who use the space most.
- Renovation and upgrade plans. Many homeowners tear down an old deck to replace it with something better a new composite deck, a concrete patio, a landscaped garden area, or a fully designed outdoor living space.
- Home value and curb appeal. A damaged or deteriorating deck actively hurts your home’s market value and visual appeal. Removing it before listing your home can make a significant difference in buyer perception and final sale price.
- Insurance requirements. Some home insurance providers flag deteriorating decks as structural risks. Removing a damaged deck can protect your coverage and even reduce your premiums.
- Simple peace of mind. Sometimes homeowners just want their yard back a clean, open outdoor space without the constant reminder of a problem they have been avoiding.
Whatever your reason, the decision to remove an old deck almost always leads to a better outcome. The key is doing it the right way.
How to Demo a Deck the Safe and Smart Way
Before you pick up a single tool, take time to plan. A rushed demolition leads to injuries, accidental property damage, and a cleanup mess that is far bigger than it needs to be. A planned demolition runs smoothly, safely, and faster than most people expect.
- Call 811 before you dig anything. This is the national call-before-you-dig hotline. Underground gas lines, electrical cables, and water pipes can run close to deck posts and footings. One call protects you from a potentially life-threatening mistake.
- Check local permit requirements. Many municipalities require a permit for demolishing a structure attached to your home. Check with your local building department before starting. Skipping this step can create expensive problems when you sell.
- Inspect the structure carefully. Walk the entire deck and note areas of rot, insect damage, and structural weakness. Knowing where the danger zones are before you start means you can work around them safely.
- Suit up properly. Safety glasses protect your eyes from flying nails and wood splinters. Heavy leather work gloves protect your hands. Steel-toed boots protect your feet from dropped tools and boards. A dust mask keeps fine sawdust and debris out of your lungs.
- Plan your debris removal before day one. This is the step that catches most DIYers off guard. A full deck teardown generates far more debris than people expect. Know exactly where everything is going before the first board comes off dumpster rental, junk removal service, or haul-it-yourself trips.
Thirty minutes of planning at the start saves hours of frustration later.
Deck Demolition Tools You Need Before You Touch a Single Board
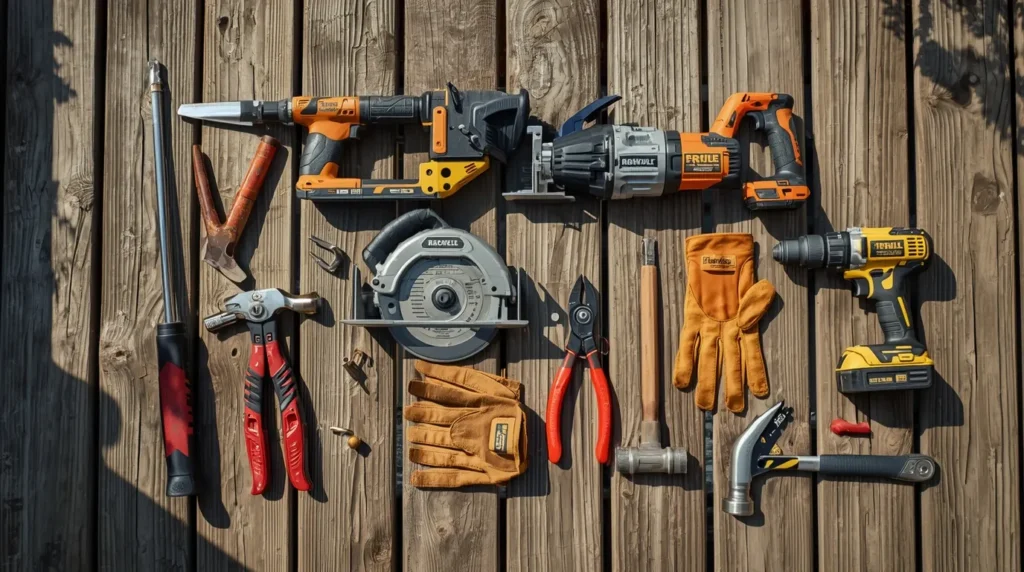
Walking into a deck demolition without the right tools is like trying to cook a full meal without a knife. You can try but it will take three times as long and feel twice as hard. Here are the deck demolition tools every homeowner needs before starting:
Large pry bar. Your most-used tool throughout the entire job. The leverage a long pry bar provides makes popping up stubborn deck boards dramatically easier than using a hammer alone.
Deck board ripper. This specialized tool slides under the edge of a deck board and uses a lever action to pop it free. It is specifically designed for this job and cuts board removal time significantly compared to a standard pry bar.
Reciprocating saw. Essential for cutting through rusted nails, corroded bolts, and wood in tight spaces where a standard saw cannot reach. A metal-cutting blade handles hardware; a wood blade handles boards.
Circular saw. Used to cut long boards into shorter sections for easier handling and loading. A 4 to 6 foot section is much easier to carry, stack, and haul than a full-length board.
Impact driver. If your deck was built with screws, an impact driver removes them quickly and cleanly. Make sure you have multiple bit sizes screw heads vary across different sections of older decks.
Hammer. For knocking loose stubborn connections, driving out nails, and general persuasion when boards resist coming off.
Cat’s paw nail puller. Digs under stubborn nail heads and gives you the grip to pull them clean. Invaluable for ring-shank nails that a standard pry bar cannot back out.
Bolt cutters. For cutting through rusted bolts and corroded hardware that cannot be removed any other way.
Wheelbarrow. Moving debris from the deck to your disposal area by hand is exhausting and slow. A wheelbarrow speeds up cleanup dramatically and saves your back.
Gather everything before day one. Mid-job hardware store runs kill momentum and add hours to the project.
How to Remove a Deck Step by Step Without Damaging Your Home
The golden rule of deck removal is simple always work from the top down. Start at the highest point and work toward the ground. This keeps the structure stable as you remove each element and prevents unexpected collapses that could injure you or damage your property.
Step 1 Remove railings and balusters.
Start at the top rail and work down. Unscrew or pry off the top rail first, then remove each baluster individually. Stack them away from your work area as you go.
Step 2 Remove stair sections.
Stairs connect to the deck frame with bolts or screws. Remove the treads first, then detach the stringers from the frame and the ground. Stairs are heavy work with a partner on this step if possible.
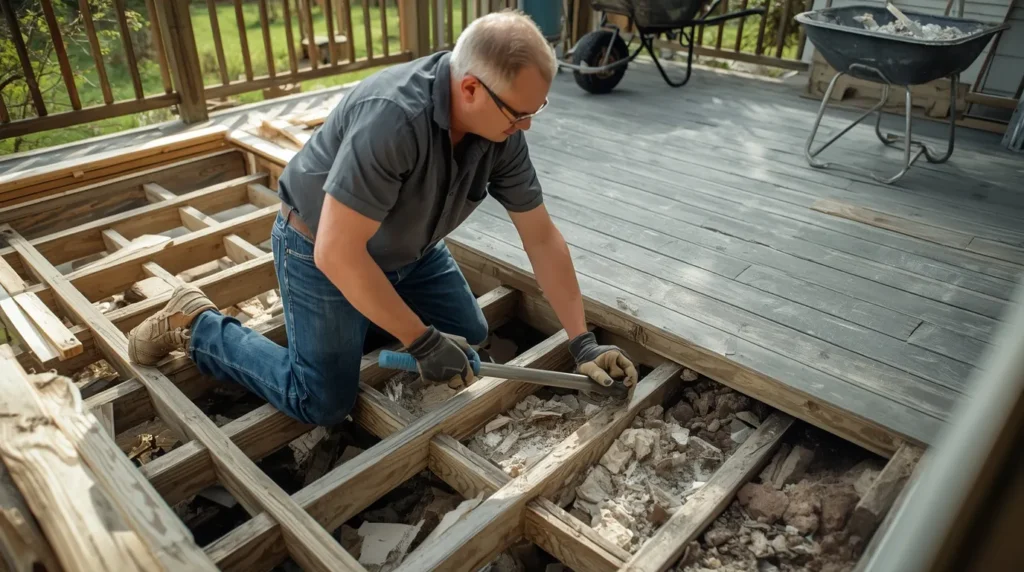
Step 3 Remove deck boards.
Start at the outer edge and work toward the house. Use your pry bar or deck board ripper to pop each board free. Move removed boards away from your feet immediately a cluttered work surface causes falls.
Step 4 Remove joists and beams.
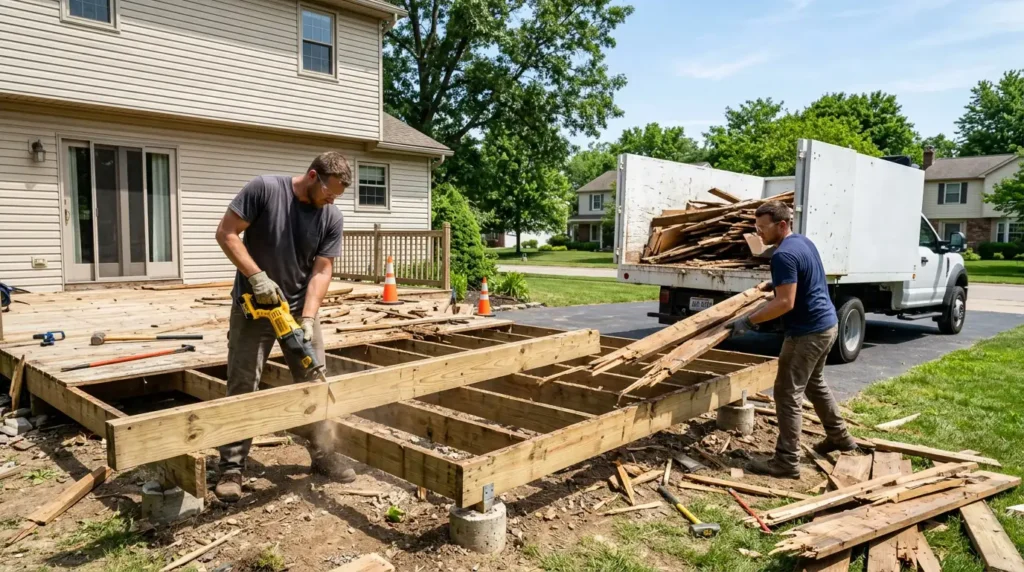
With boards off, the full frame is exposed. Remove joists first by unscrewing or cutting the fasteners at each connection point. Then take down the outer beam sections.
Step 5 Remove the ledger board with care.
The ledger board bolts directly into your home’s rim joist. This is the most critical step of the entire job. Remove it carefully and inspect the area behind it immediately. Any exposed wood or insulation needs protection from moisture right away.
Step 6 Remove posts and footings.
Posts typically attach to concrete footings with post brackets. Remove the bracket hardware first, then lift the post free. Concrete footings may require a digging bar, reciprocating saw, or jackhammer depending on depth and condition.
Work one step at a time. Finish each phase completely before moving to the next.
The Best Way to Remove Deck Boards Without Breaking a Sweat
Deck boards are the most time-consuming element of the entire demolition. Here is how to move through them as fast and efficiently as possible.
- Position your pry bar directly over a joist. Never pry in the middle of a board span it snaps the board and wastes material. Prying over a joist gives you solid resistance and clean removal.
- Use the deck board ripper for maximum speed. Slide the flat end under the board edge, step on the handle, and let the leverage do the work. This single tool cuts board removal time nearly in half on most jobs.
- Cut long boards before prying. Use your circular saw to cut boards into 4 to 6 foot sections first. Shorter boards pry off more easily and are far simpler to carry and load.
- Work with a partner. One person pries while the other carries removed boards to the debris pile. This rhythm keeps your work area clear and the job moving at a steady pace.
- Cut through stripped screws instead of fighting them. When a screw head is stripped beyond use, skip it. Slide your reciprocating saw between the board and joist and cut right through the fastener. Fast, clean, effective.
Smart technique beats brute force every single time.
How to Remove Nailed Deck Boards the Right Way
Nailed boards are tougher than screwed ones but with the right approach they come up cleanly and efficiently.
- Use a fulcrum under your pry bar. Place a scrap piece of wood under the pry bar head before levering. This protects the joist from damage and gives you significantly more mechanical advantage.
- Work both ends of the board alternately. Pry one end up slightly, then move to the other end and pry again. Alternating back and forth walks the nail out gradually without snapping the board.
- Use a cat’s paw for stubborn nails. Drive the curved end under the nail head with a hammer tap, then lever it out. This tool handles ring-shank nails that a standard pry bar simply cannot back out.
- Cut nails with a reciprocating saw when needed. Slide a metal-cutting blade between the board and joist and cut through the nail shaft. This is the fastest solution for nails that refuse to budge any other way.
- Remove exposed nails from boards immediately. The moment a board comes off, pull or bend flat every exposed nail. A board with upward-pointing nails on the ground is one of the most common causes of serious foot injuries on demolition sites.
Patience and proper technique make this step far easier than most people expect going in.
How to Pull Up Decking Boards Tips That Save You Time
Beyond basic technique, here are field-tested habits that make the whole board removal process faster and safer.
Work in the morning. Wood contracts slightly in cooler temperatures and is easier to pop loose. Morning work sessions are more comfortable and more productive than afternoon sessions in summer heat.
Apply penetrating oil to stubborn fasteners. Spray WD-40 or a dedicated penetrating lubricant on rusted screws and nails 10 minutes before starting. It loosens corrosion significantly and makes removal much smoother.
Divide the deck into working sections. Label sections left, center, and right. Complete one section fully before moving to the next. This keeps your work area organized and your progress measurable.
Stack removed boards consistently. Always stack with nail ends pointing in the same direction away from your walking path. This simple habit prevents a shocking number of foot and ankle injuries.
Clear your work area every 20 minutes. Load the wheelbarrow and move debris to your disposal area regularly. A clear deck surface is a safe deck surface. Tripping on removed boards mid-demolition is how injuries happen.
Small habits compound into big time savings across a full demolition day.
Deck Demolition and Removal What to Do With the Debris
Here is the part most how-to guides skip entirely what actually happens to all that wood, hardware, and concrete after your deck comes down.
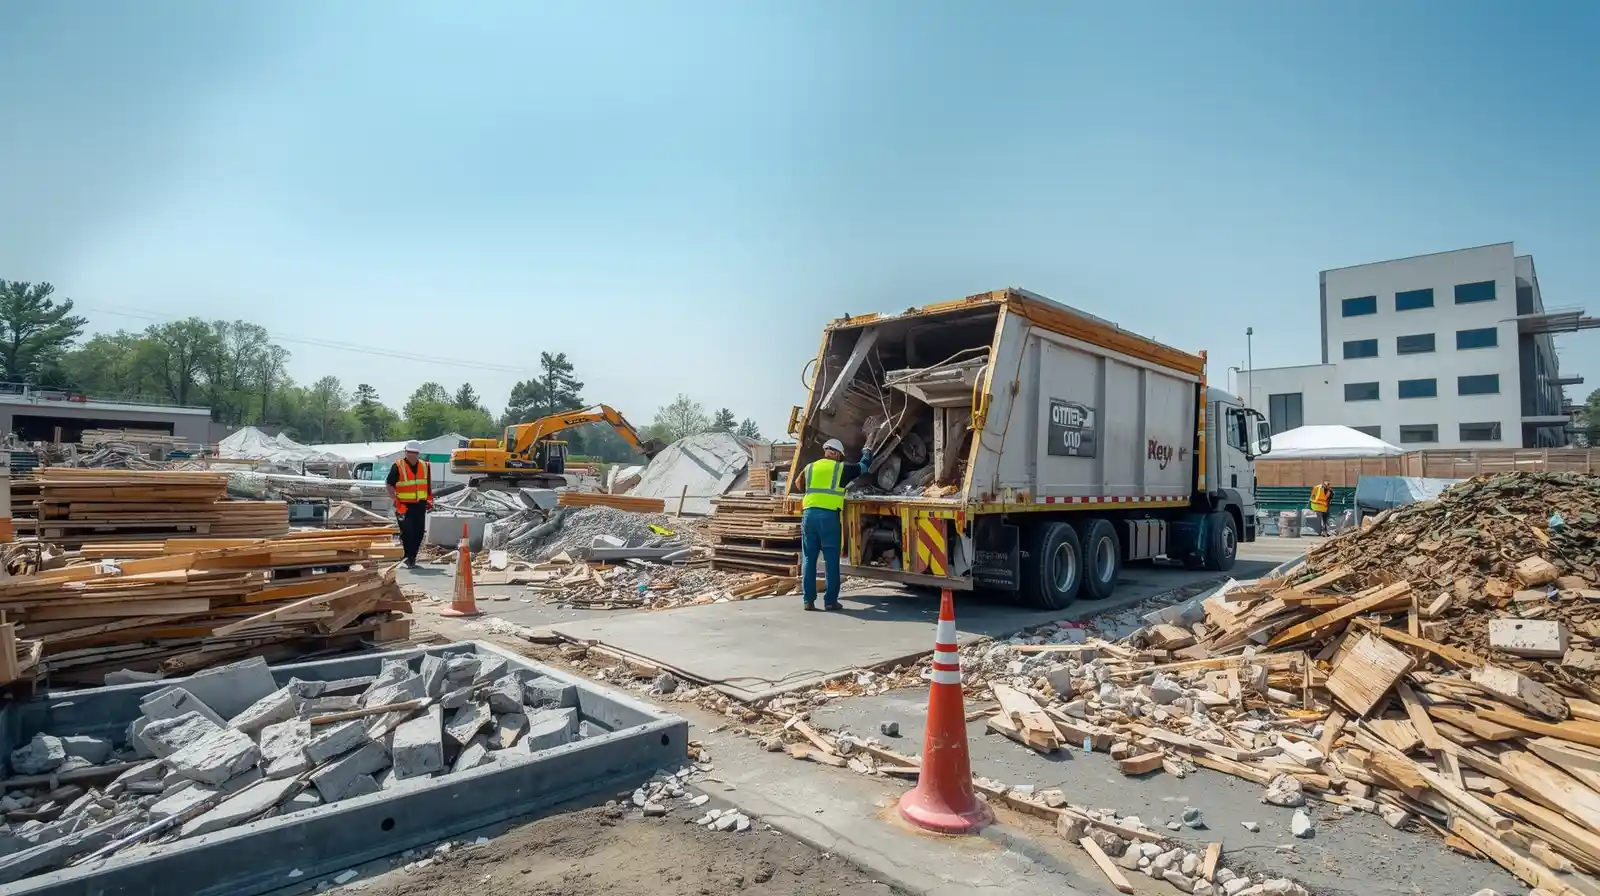
A standard residential deck generates more debris than most homeowners anticipate. Old pressure-treated lumber, rusted nails and hardware, concrete footing chunks, and miscellaneous material pile up fast. Here is how to handle it all responsibly.
Set aside salvageable lumber. Boards still in reasonable condition can be repurposed for raised garden beds, firewood, or small building projects. Separate these from the waste pile as you work.
Sort metal hardware separately. Nails, screws, bolts, joist hangers, and post brackets all qualify as scrap metal. Many recycling facilities accept mixed metal keeping it out of the landfill takes minimal extra effort.
Handle pressure-treated lumber carefully. Older pressure-treated wood may contain chemicals that restrict how it can be legally disposed of. Check your local waste management guidelines before tossing it in a standard dumpster.
Rent a dumpster for large volumes. A dumpster on site lets you toss debris continuously as you work and schedule one pickup at the end. Convenient for multi-day projects.
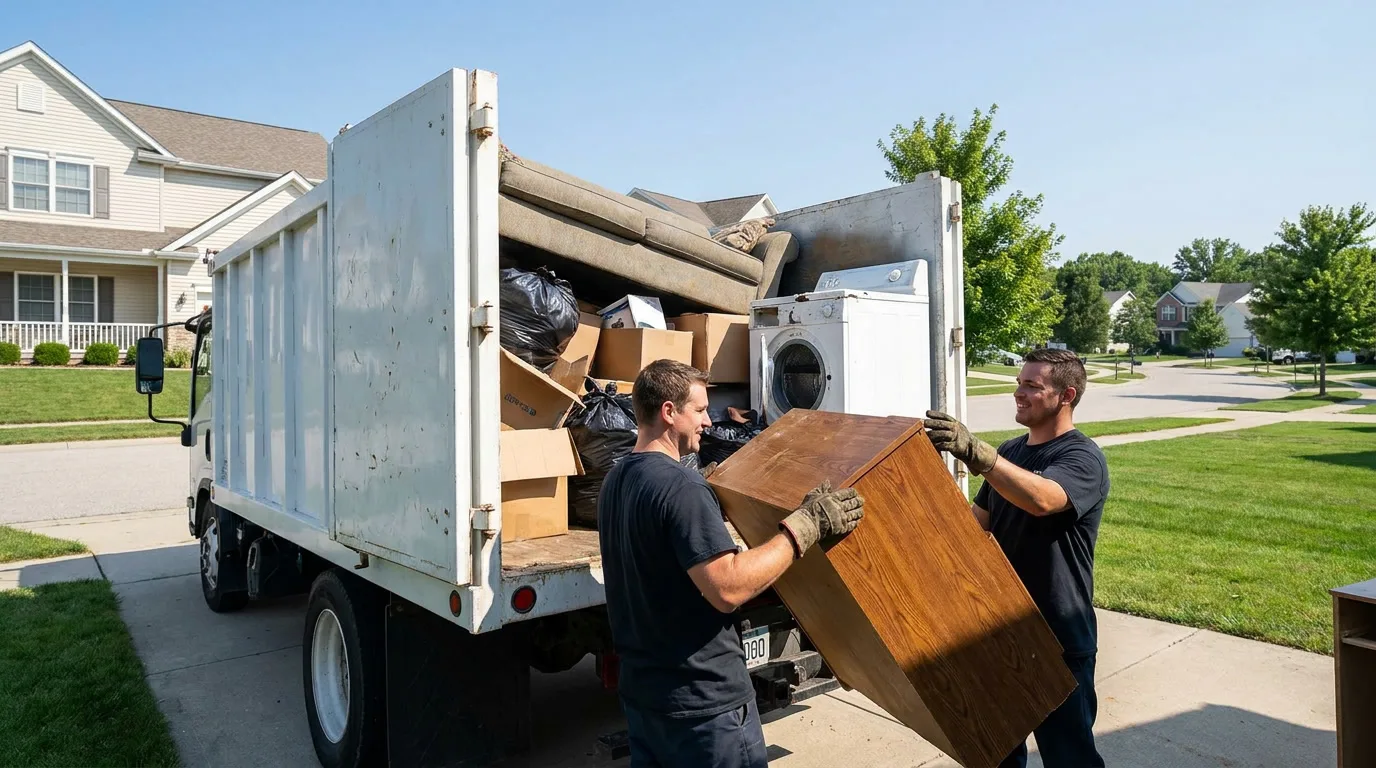
Call a junk removal team for the fastest solution. A professional junk removal service loads every piece of material and hauls it away in a single visit no dumpster fees, no sorting headaches, no multiple dump runs on your end.
Deck Demolition and Debris Removal in Virginia Know Your Options
Virginia homeowners have solid local resources available for post-demolition debris removal. Most counties schedule bulk item pickup days for large household and construction items check your county government website for current dates and guidelines.
The Virginia Department of Environmental Quality provides clear guidance on disposing of pressure-treated lumber and other materials that require special handling. Their resources help homeowners stay compliant without spending hours researching regulations independently.
For homeowners who want everything handled in one appointment demolition, debris loading, and responsible disposal working with a local professional team eliminates every extra step. One call covers the entire job from first board to final cleanup.
When to Skip the DIY and Call a Professional Demolition Team
DIY deck demolition works well for motivated homeowners with the right tools and a manageable size deck. But there are clear situations where calling a professional team is simply the smarter and safer choice.
The deck is large or multi-level. Bigger structures take longer, require more specialized tools, and generate significantly more debris than a single small platform.
You spot serious structural damage. Heavily rotted framing, collapsed sections, or significant insect damage make the structure unpredictable and dangerous to work on without professional experience.
The tool investment does not make sense. Buying or renting all the necessary deck demolition tools for a one-time job can easily cost as much as hiring a professional crew that already owns everything.
Your timeline is tight. A professional crew completes most residential deck demolitions in a single day. The same job done solo often stretches across multiple weekends.
You want debris handled too. Most homeowners significantly underestimate debris volume. A professional team removes every piece in one trip no leftover mess, no follow-up dump runs.
The ledger board connection worries you. Removing the ledger board incorrectly can damage your home’s structure and create serious water intrusion problems. If this step makes you nervous, that is a strong signal to call a pro.
The Junk Thief specializes in full-service deck demolition and removal across Virginia. Their experienced crew arrives with every tool needed, tears down the structure safely and efficiently, removes every piece of debris, and leaves your yard completely clean. Salvageable materials get recycled. Metal hardware goes to recycling facilities. Everything else gets disposed of properly including pressure-treated lumber requiring special handling.
Upfront pricing. No hidden fees. Same-day and next-day availability. A fully licensed and insured team that respects your property from the first board to the final walkthrough.
Conclusion
Deck demolition does not have to be overwhelming. With the right plan, the right tools, and a clear step-by-step process, removing an old deck is completely manageable and the result is always worth it. A clean, open outdoor space ready for whatever you have planned next.
Whether you take it on yourself or bring in a professional team, the important thing is making the decision and moving forward. Every season you wait is another season of safety risk, lost curb appeal, and missed opportunity to enjoy your outdoor space the way you deserve.
Start with a plan. Use the right tools. Work safely. And when the job calls for professional hands, do not hesitate to make the call.
Tired of looking at that old deck every single day? The Junk Thief is ready to show up, tear it down fast, and haul every last piece away leaving your yard spotless and your weekend free. Same-day appointments available. Free quotes with zero obligation. Reach out to The Junk Thief today and take back your outdoor space for good.